Now that we have setup the server side application and repository, clients (developers) should have access to repositories using a client tool.
A useful tool for this purpose is the TortoiseSVN. It's a subversion client for windows. (Please note that subversion is the core of the Version Control Server). It support several protocols including http (the one we will use for VisualSVN Server) and it's really easy to use.

After you have downloaded and installed the application you will be surprised that there's no applications to run (rather than the diff and merge applications) to manage files. Instead, under the windows explorer you will find new options when you right-click on a file or folder (that's what it's called a shell extension).
The first step to setup your environment is by creating a directory where your files will be stored where you take them from the repository. Of course this folder can be the location of the sources after you created a project, or the location of your local web application.
So, choose your target directory and right click, then select "SVN Checkout".
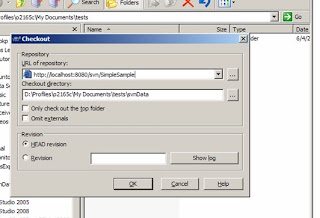
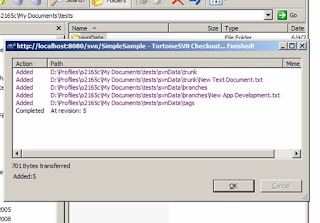
A window will ask you for some information like the location of the SVN server (in this particular case is the SimpleSample folder) and click OK. This action will take a copy of all files from the repository into the folder you selected.
Now, you can open any file inside that folder and start the edition process, and saving in your local machine. Then, when you feel comfortable with its functionality, you can send it back to the repository by selecting SVN Commit and of course, you can get the latest version of the file by clicking SVN Update.
Of course there's more than that, but at least you have your SVN working and you can try other great features like merging, file versions, etc.
Comments